

We live in a digital world, so why the heck are we still printing out W9 forms, writing on them with a pen, and mailing (or faxing) them? Did you know you can do the entire process of filling out, signing, and sending a W-9 ONLINE?
When you start work with a new client as a freelancer, the client will likely ask you to send them a W-9. A W-9 is an IRS form that asks you for information that your client will need in order to issue you a 1099, which is a form YOU need when you file your taxes.
Below, I’ll walk you through the steps on how to fill out your W-9 as a freelancer.
**Disclaimer** I am NOT a tax or legal professional, so the following is not tax or legal advice. Please consult with a trained professional to find out what you should do in your unique situation.
How to Fill Out a W-9 Digitally
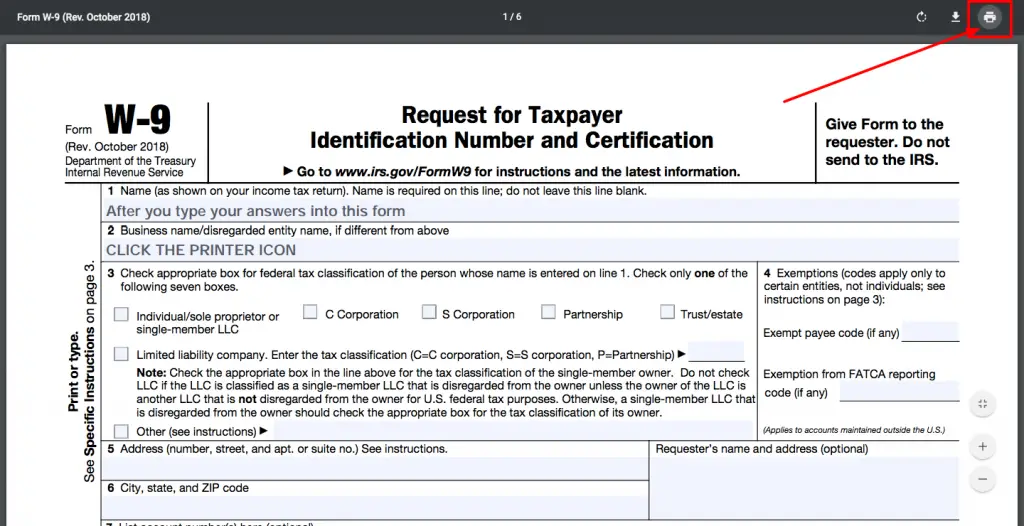
First, download a W-9 form PDF for free from the IRS website. Then, you can type your answers into it.
Line 1: Name (as shown on your income tax return). Name is required on this line; do not leave this line blank.
This is easy enough: If you are a sole proprietor or single-member LLC (which most freelancers are), put your first and last name (and potentially your middle name or middle initial). Put on this line whatever you put on your income tax return. Not sure? Pull out your last year’s income tax return and see what name you put on there.
Line 2: Business name/disregarded entity name, if different from above.
If you have a fictitious business name or doing business as DBA, you may put it on line 2. So, for example, if my name is Avery Wyatt, but my DBA is Five Star Writing Services, then on line 1, I’d put “Avery Wyatt,” and on line 2, I’d put “Five Star Writing Services.”
Line 3: Check appropriate box for federal tax classification of the person whose name is entered on line 1. Check only one of the following seven boxes.
For line 3, the vast majority of freelancers will check the box next to “Individual/sole proprietor or single-member LLC.”
Line 4: Exemptions (codes apply only to certain entities, not individuals; see instructions on page 3):
The vast majority of freelancers will leave this part blank.
Line 5 Address (number, street, and apt. or suite no.) See instructions.
Whatever address you enter here is where your client will send your 1099s. Your 1099s are important because you need them in order to file your tax returns. Many clients send 1099s digitally, but in case they don’t, make sure this address is one where you can check the mail.
For most sole proprietor freelancers, this address will be the same address they put on their income tax returns (their home address), unless they rent an office or have a separate mailbox for business mail.
Line 6 City, state, and ZIP code
Simple enough!
Part I Taxpayer Identification Number (TIN)
A Taxpayer Identification Number is either your Social Security Number or Employee Identification Number. For most freelancers, you can enter your SSN. However, I recommend getting an EIN (it’s free!) for your freelancing business (EVEN if you are a sole proprietor!) so that you can put the EIN on the W-9 instead of your SSN. This helps protect your identity and privacy.
IF you are a single-member LLC, which number you put here gets a bit tricky. Some single-member LLC owners put their SSN, others put their LLC EIN, and still others put their old sole proprietor EIN.
Read more about which Tax Identification Number you should enter on your W-9 as a single-member LLC.
Part II: Sign!
Yes, you could print this out, sign it with a pen, scan it, or fax it to your client—but who can do that these days? (I don’t own a printer.)
How to Sign a W9 Online
To sign your W-9 electronically, here’s what I recommend:
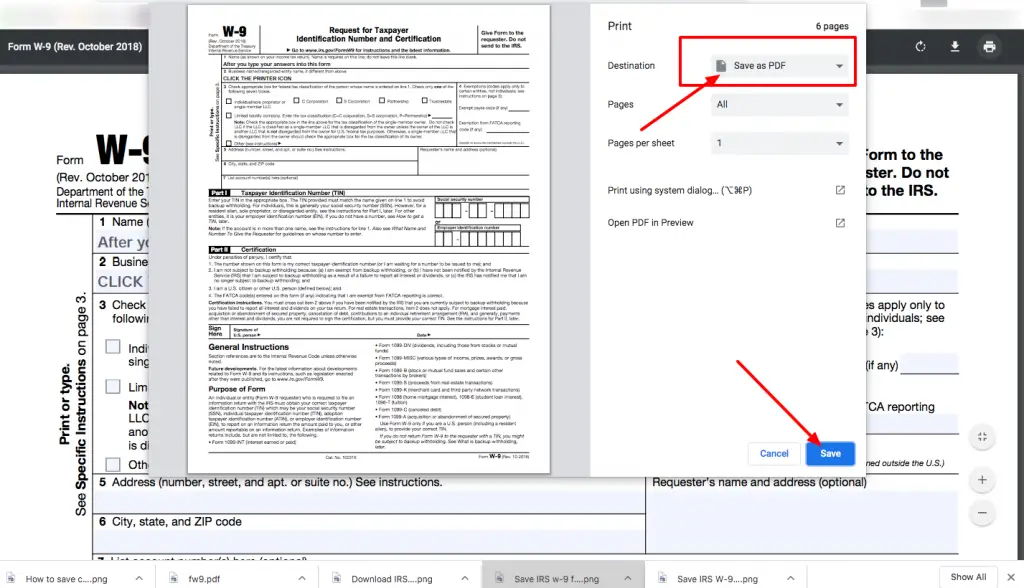
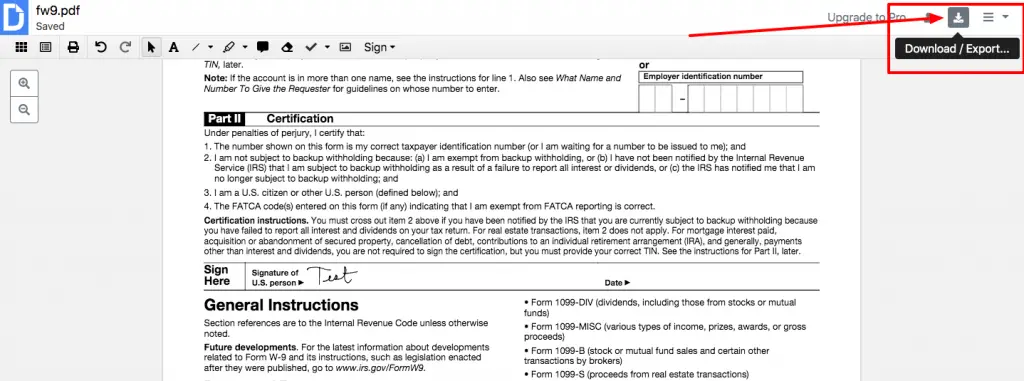
Step 1: After you type your information into the W9 form, save it as PDF by clicking the printer, icon NOT the down arrow icon.
When you click the printer icon, a dialog window will pop up. Be sure that “Destination” says “Save as PDF” as shown below. Then click “Save”:
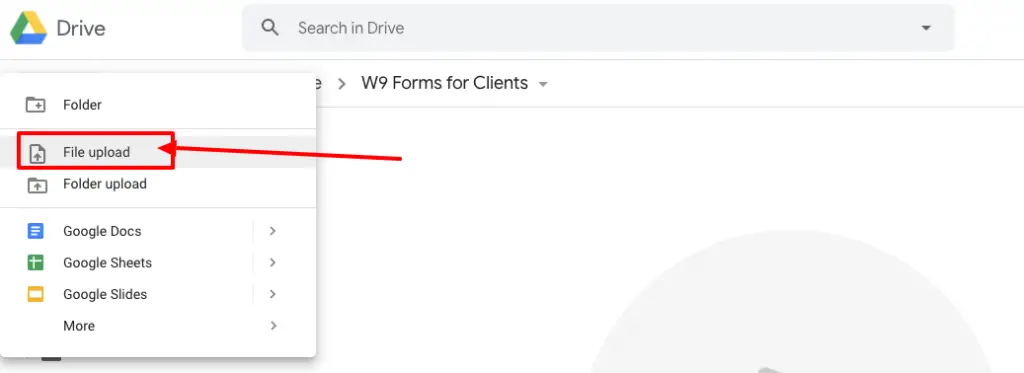
Option A: Sign in to your Google Drive account, upload your W-9 form PDF, and then
Option B: Go straight to DocHub.com and create an account, without using your Google account.
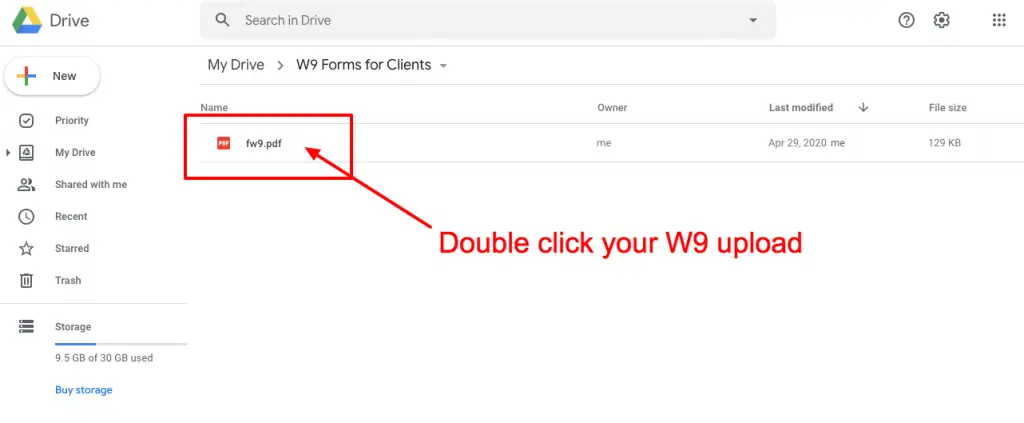
Step 2: Upload the completed W9 PDF to your Google Drive
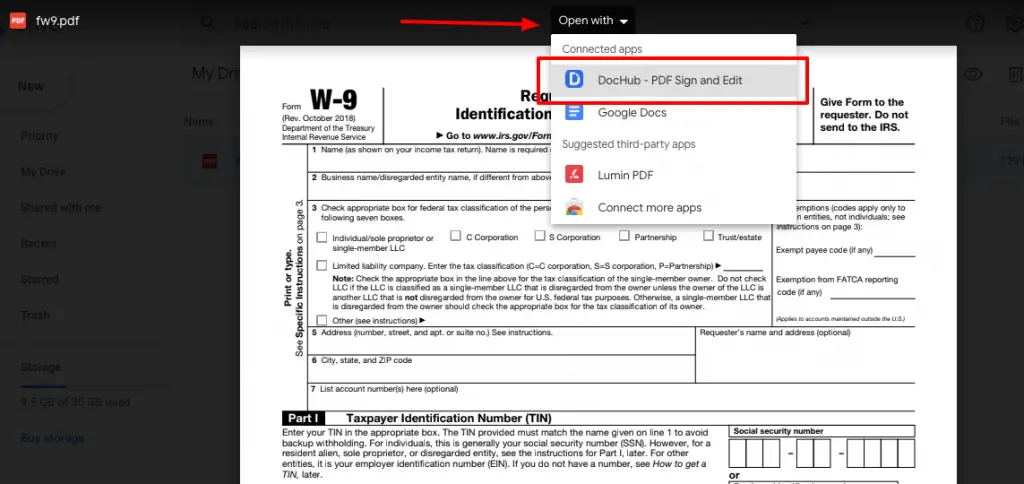
Step 3: Double click the uploaded W9 in Google Drive
Step 4: Click “Open With” > “DocHub”
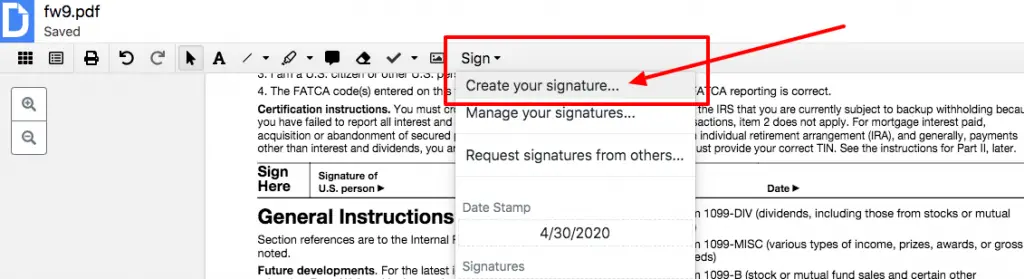
Step 5: Click “Sign” > “Create your signature
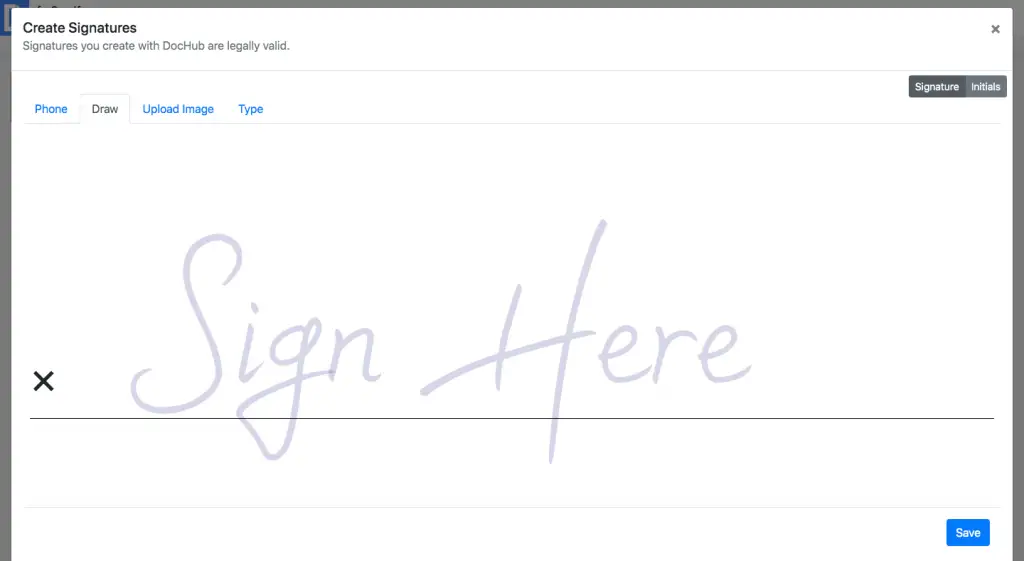
Step 6: Sign with your computer mouse!
Step 7: Click “Sign” and find your signature in the dropdown
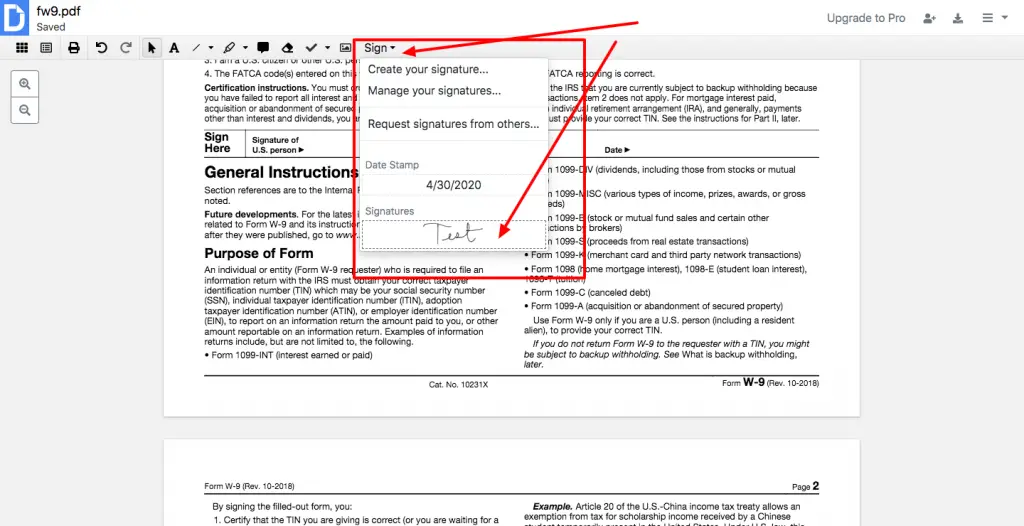
Step 8: Stamp your signature onto the signature line
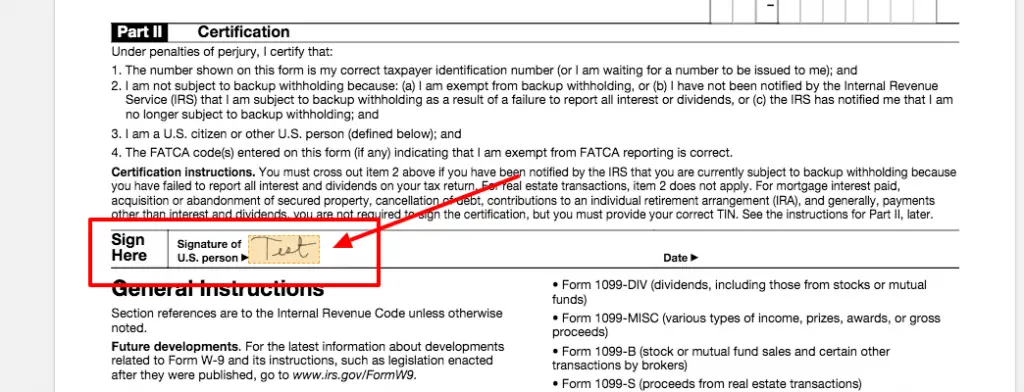
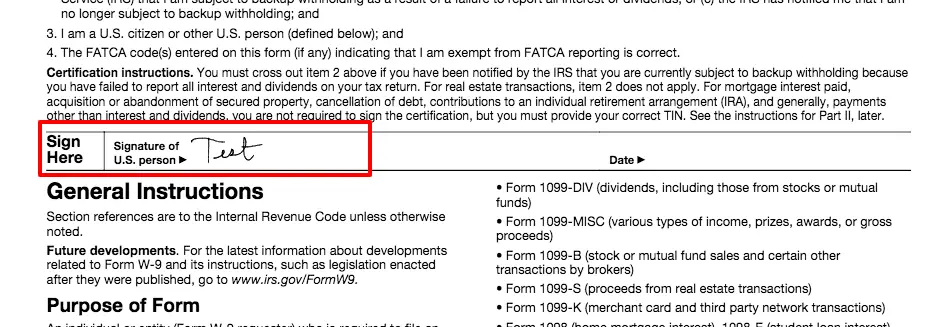
Step 9: Download the signed W9
And there you have it — your completed and signed W9 all done online!
How to Securely Send Your W9 Online (DO NOT email it!)
A W9 contains sensitive information—name, tax identification number, address that could be used to steal your identity, so you do not want to attach it to an email. Email is typically NOT secure, and hackers could potentially get it, especially if the attached document sits in your client’s inbox for years to come.
I recommend using Sync — a secure cloud storage platform that is end-to-end encrypted. And no, Google Drive is not end-to-end encrypted.
The added benefit to Sync is that you can password-encrypt the link to your document, meaning the recipient must know the password in order to access the link. You can also set your links to expire.
What I typically do, because I don’t want to make it so complicated for my clients, is I email my client the link to my W9. I do not put a password on it, but I do make sure it expires within 48 hours. That way, if someone hacks my client’s email two years from now, they can’t click that active link and still access my W9.
Step 1: Sign up for a free Sync account.
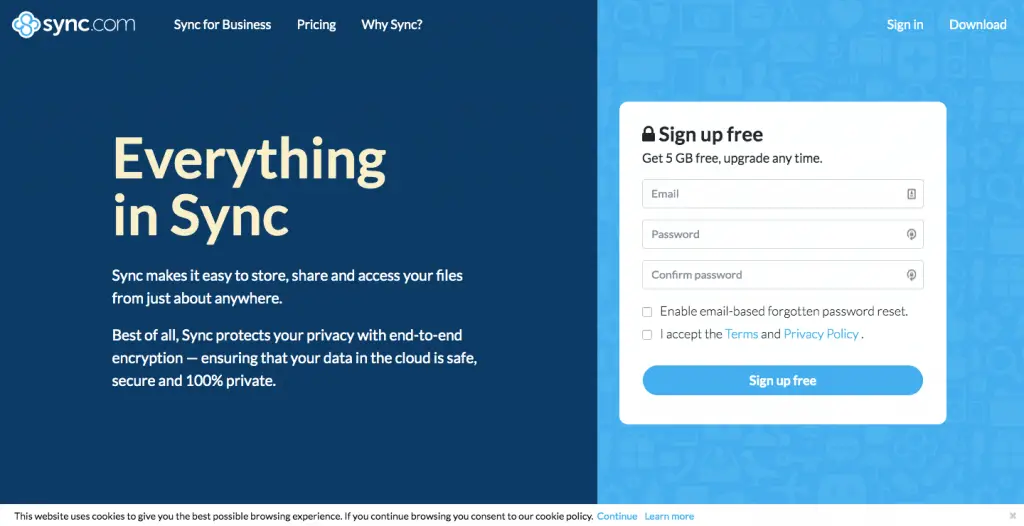
Step 2: Upload your W9 to your Sync account.
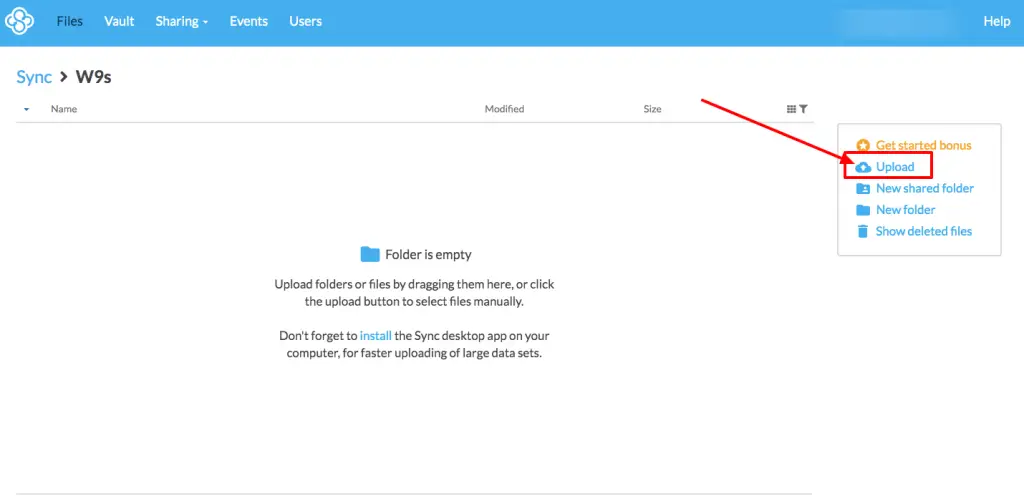
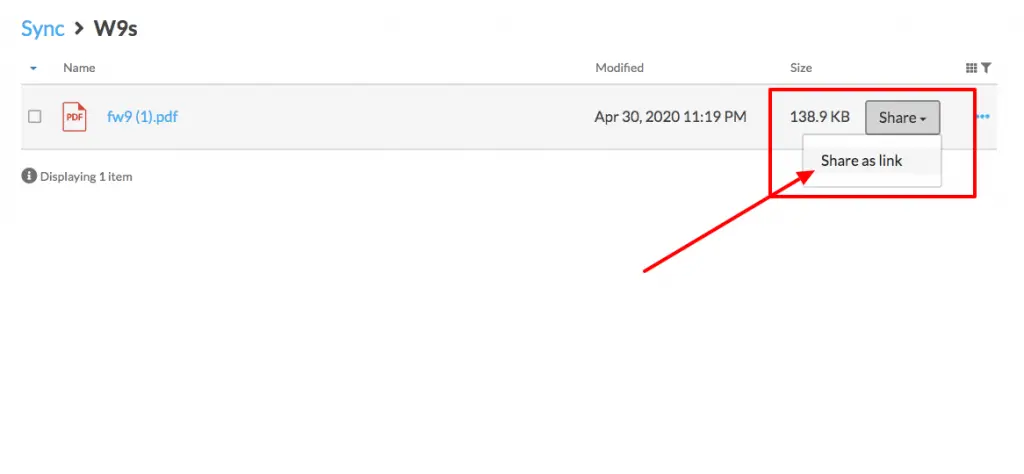
Step 3: Click Share > Share as link
Just copy the link. You can click the button that says “Copy link.” Now, paste it into an email to your client.
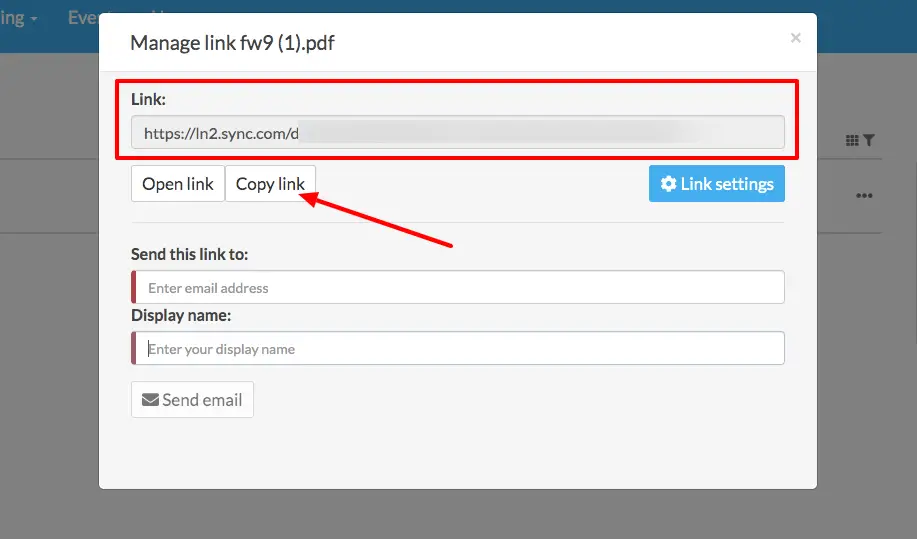
Step 4 (OPTIONAL): Click Link Settings and set a password.
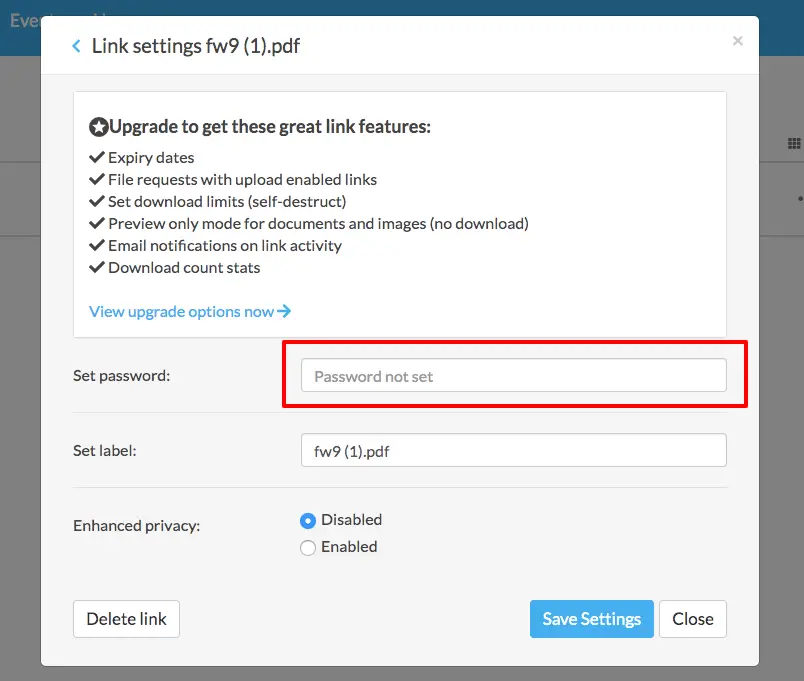
If you choose to password-protect your link, call your client and give them the password over the phone. Emailing them the password kind of defeats the purpose because, again, emails can be intercepted.
Of course, if you are using your EIN instead of your SSN, this W9 is way less sensitive of a document. That’s why I highly recommend getting an EIN, even as a freelancer. Even so, you don’t want to be giving out your EIN because identity theft can still happen that way; it’s just less likely.


Add comment